

The crew's at the laydown area before sunrise. Someone's pulling stiff gloves over cold hands, a rigger's trying to settle a radio under a collar, and the jacket that felt comfortable beside the ute suddenly feels inadequate in the wind. You need winter work jackets that suit the shift, not just the walk from the car park.
Table of Contents
- A Pre-Dawn Start That Frames the Real Choice
- How Layering Actually Works on a Cold Site
- Insulation Types, Shells and Linings Compared
- Why a Warmer Jacket Is Not Always a Safer One
- Hi-Vis, Reflective Tape and AS 4602.1 in Winter
- Fitting Women Properly on Australian Sites
- Matching the Jacket to Your Site Conditions
- A Pre-Buy Checklist for Crews and Procurement
A Pre-Dawn Start That Frames the Real Choice
A shutdown morning can expose a poor clothing decision before the first lift. One worker's standing still waiting for instructions while another's already moving gear. Give both the same heavily insulated jacket and you haven't necessarily solved either person's problem.
Consider a typical buying choice: a thick jacket with limited adjustment, or a lighter outer shell with separate insulation underneath. The thick option looks straightforward on an order sheet. The layered option asks more questions about the work, but that's exactly why I'd start there.
For crane operators, riggers, FIFO workers and shutdown crews, warmth is a requirement, not the whole specification. Procurement managers also need to account for movement, weather protection, visibility and the people who'll wear the order.
Buy for the task, not the hanger
Most jacket comparisons start with insulation and finish with price. A useful worksite assessment starts with what the worker does while wearing it.
- Crane operators: Trial the jacket seated, with the seat belt fastened and controls within reach.
- Riggers and doggers: Check overhead reach, signalling movements and access to equipment.
- Shutdown crews: Account for transfers between exposed work areas, vehicles and sheltered spaces.
- Procurement teams: Get representative workers into samples before approving a crew order.
A fleece garment illustrates why appearance alone can't settle the outerwear decision.
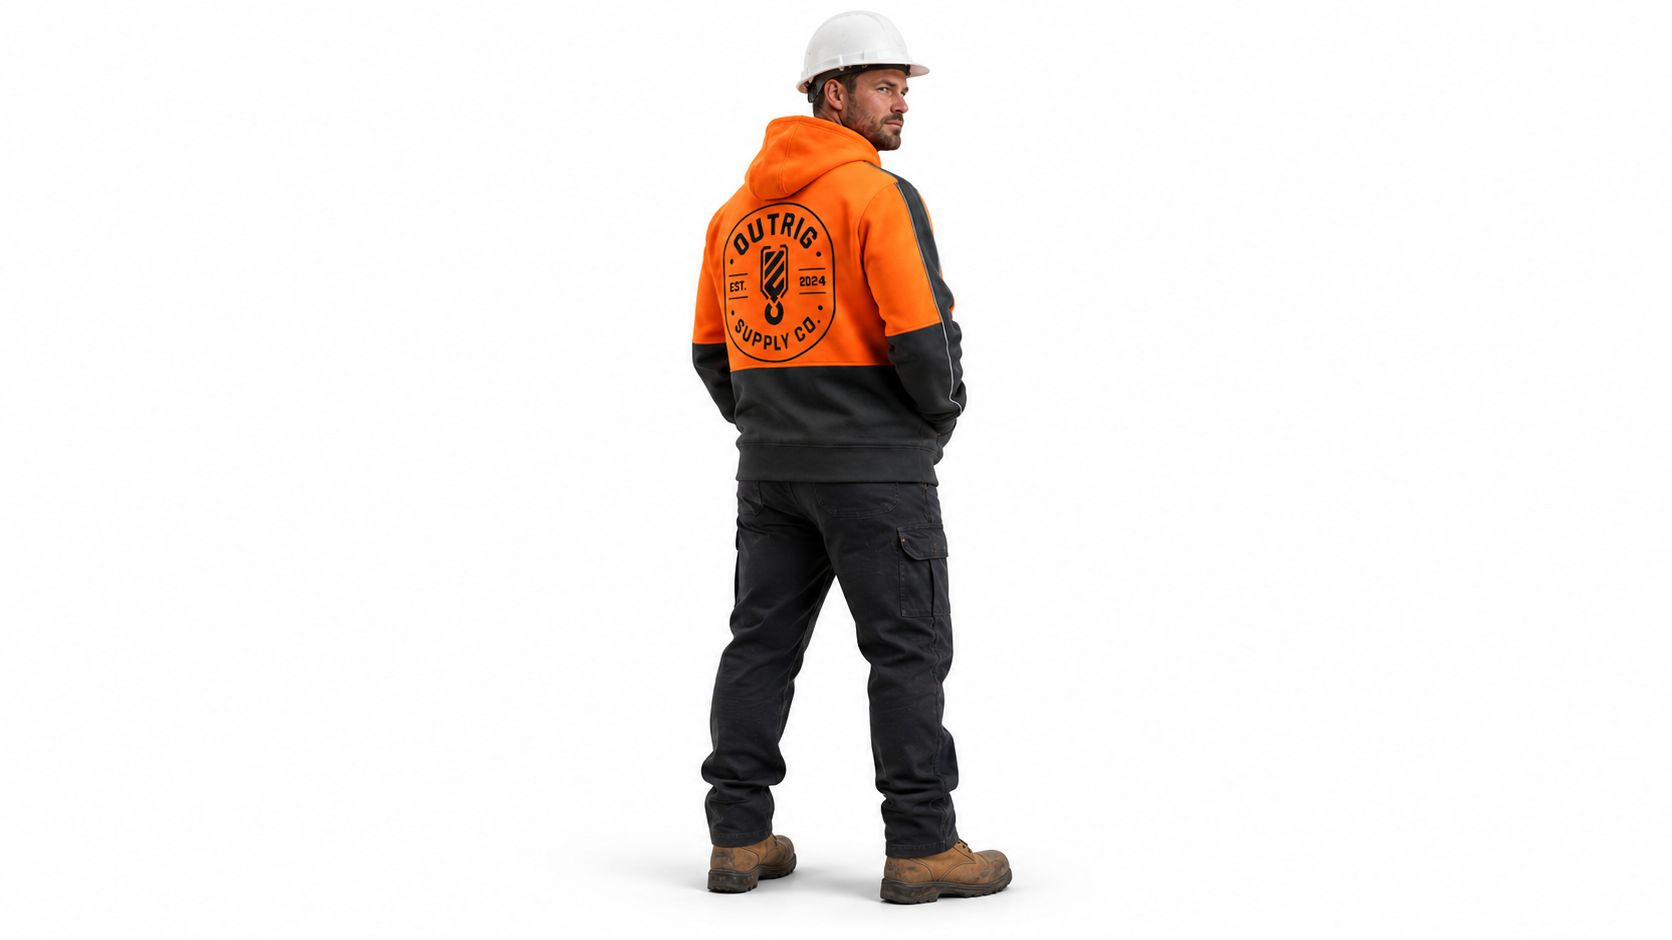
The question isn't whether a garment looks substantial. It's whether its documented protection, cut and adjustment suit the job, and whether the site accepts it for the intended use.
Buying rule: Set the clothing requirements from the work and exposure first. Choose the garment afterwards.
Make separate decisions about insulation type, shell protection, visibility classification and fit. Don't let a comfortable lining distract you from an unsuitable shell, or bright fabric distract you from missing visibility documentation.
A jacket also needs a place in the site's cold-work arrangements. If the buying conversation never reaches shelter, heated spaces or opportunities to change wet clothing, the specification isn't finished.
How Layering Actually Works on a Cold Site
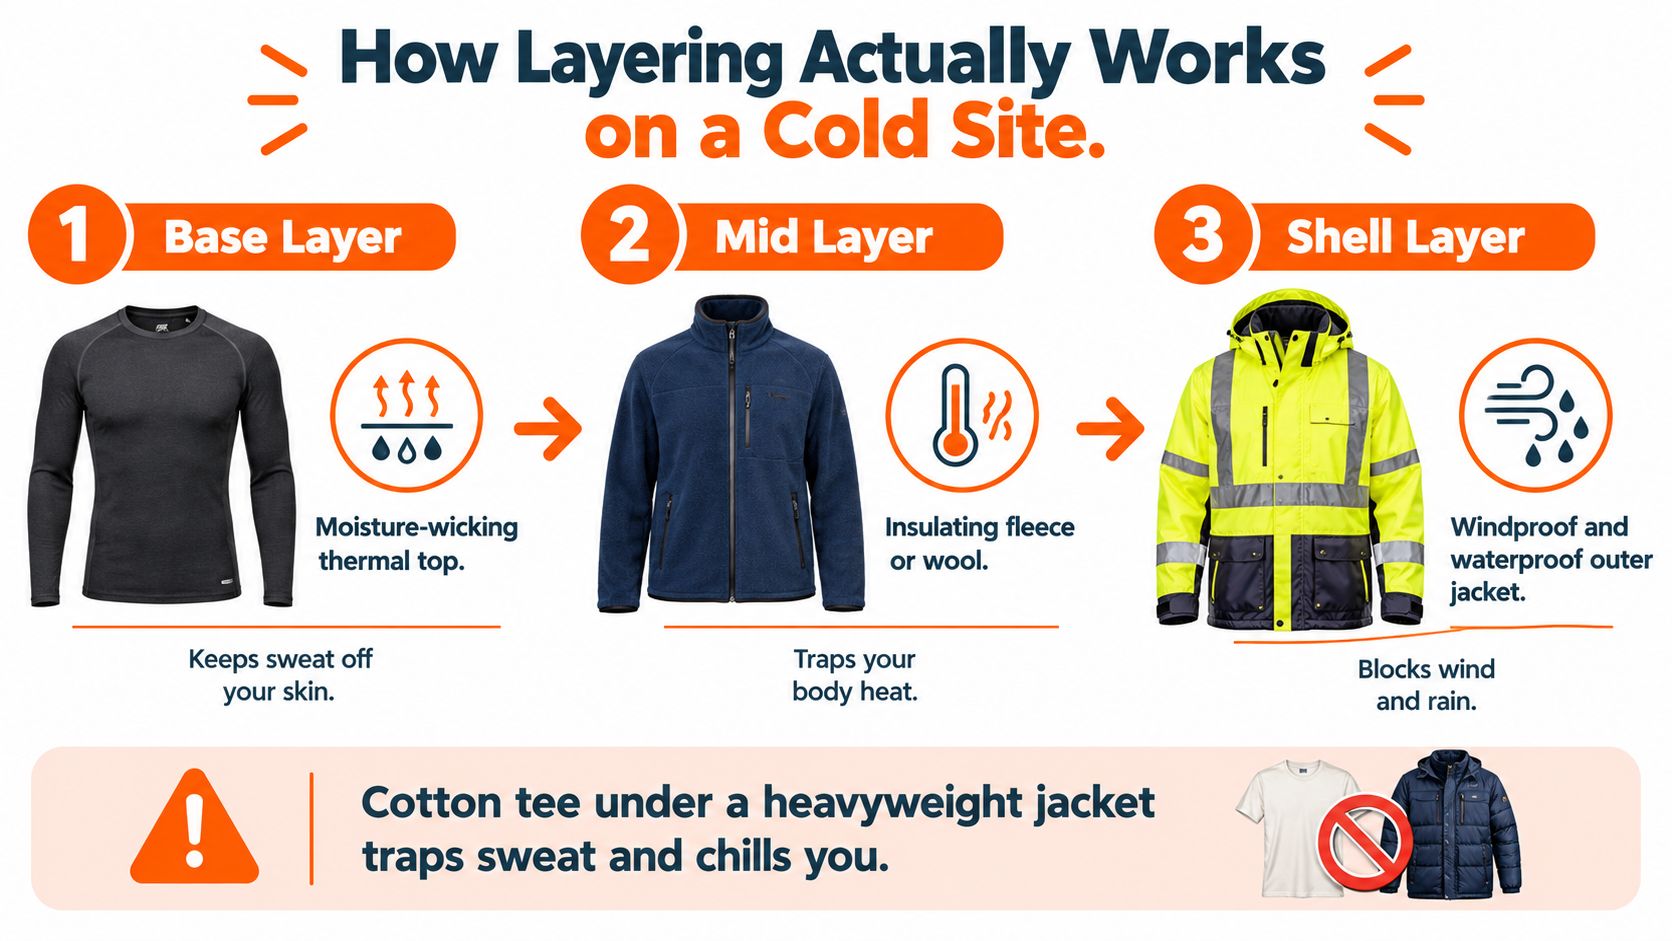
Treat the jacket as the outside of a clothing system, not a replacement for one. SafeWork NSW's cold-environment guidance recommends three functional layers: a moisture-managing base, an insulating middle and a windproof or waterproof outer layer with ventilation. It also explains why wet clothing compromises insulation and recommends spare protective clothing when workers become sweaty or move between temperatures.
That's the weakness in the heavyweight-jacket-over-a-tee approach. During physical work, the worker may generate sweat without a useful way to adjust insulation. When activity stops, damp clothing becomes a thermal liability.
Give each layer a job
- Base layer: Choose a moisture-managing thermal top that fits comfortably against the body. Don't expect the outer jacket to manage moisture trapped underneath it.
- Middle layer: Use an insulating garment that can be removed or adjusted as work intensity changes. Trial its sleeves and collar beneath the intended shell.
- Outer layer: Specify wind or rain protection appropriate to the exposure, with practical ventilation and room for the layers underneath.
The arrangement below separates those functions rather than asking a single garment to do everything.
One mid-layer option is the Outrig Supply Co Hi-Vis Hoodie – Orange/Black, a polyester fleece garment with a microfibre-lined hood, zipped mobile-phone chest pocket and ribbed cuffs and waist. Its unisex cut needs a layered fit trial, and its reflective piping doesn't remove the need to confirm the site's visibility requirements.
For women comparing middle-layer cuts, the women's work jumper guide is a useful companion to the outer-jacket fitting process. Assess the jumper and shell together rather than approving each independently.
Make dry replacements part of the issue
Pack a replacement base or insulating layer where it'll remain dry and accessible. A spare buried back at camp isn't much use when someone needs to change during the shift.
Shift preparation: Issue somewhere to store dry clothing as well as the clothing itself.
Before entering a heated crib room, workers should be able to adjust their clothing rather than sit bundled in the full outdoor setup. Before returning outside, they need time and space to restore the appropriate layers. Build that routine into the shift instead of relying on workers to improvise.
Insulation Types, Shells and Linings Compared
I'd favour adjustable insulation over maximum fixed bulk for crews whose work alternates between physical effort, waiting and vehicle travel. That's a procurement preference, not a claim that every removable lining outperforms every fixed jacket.
Synthetic fill versus down, and PU-coated versus membrane shells, are useful comparisons only when you've got the actual garment specifications. Material names don't tell you enough about the finished jacket's protection, ventilation, care requirements or suitability around the crew's equipment.
Insulation and Shell Choices for Australian Worksites
| Option | Best For | Watch Out For |
|---|---|---|
| Synthetic fill | A procurement shortlist where documented care and damp-use suitability match the work | Don't assume all synthetic jackets offer equivalent insulation or washability |
| Down fill | Applications where the supplier can substantiate suitability for the expected exposure | Require clear wet-use and care instructions before considering it for a damp shift |
| PU-coated shell | Jobs where the finished garment's documented weather protection meets the specification | Check ventilation, seam construction and cleaning restrictions |
| Membrane shell | Active work where documented weather protection and moisture management suit the task | Don't buy on membrane terminology alone |
| Fixed insulated lining | A comparatively consistent work pattern with limited need to change insulation | Trial the garment through both active and inactive tasks |
| Removable or zip-in lining | Work involving changing activity levels or environments | Check attachment points, sleeve alignment and storage for removed components |
For exposed, damp work, my recommendation is to shortlist synthetic insulation with a separate protective shell, then verify the combination against the supplier's documentation. I wouldn't approve down because it feels warm during an indoor fitting. Equally, I wouldn't reject a shell merely because its construction sounds less technical than a competing product.
For shell-specific fit questions, use the women's shell jacket guide alongside an actual sample trial. The garment still needs to work over the intended insulation.
Read the care label before the purchase order
Give suppliers the actual work pattern: grease exposure, contact with rough surfaces, repeated vehicle transfers and the cleaning arrangements available to the crew. Ask them to identify limitations in writing.
A removable lining is only useful if workers can take it out without a wrestling match and store it somewhere clean. A fixed lining may be the simpler choice for a stable task, provided the trial confirms acceptable movement and adjustment.
Approve the complete garment, not the fabric description. Include closures, lining attachments, cuffs and pocket access in the sample inspection.
Why a Warmer Jacket Is Not Always a Safer One
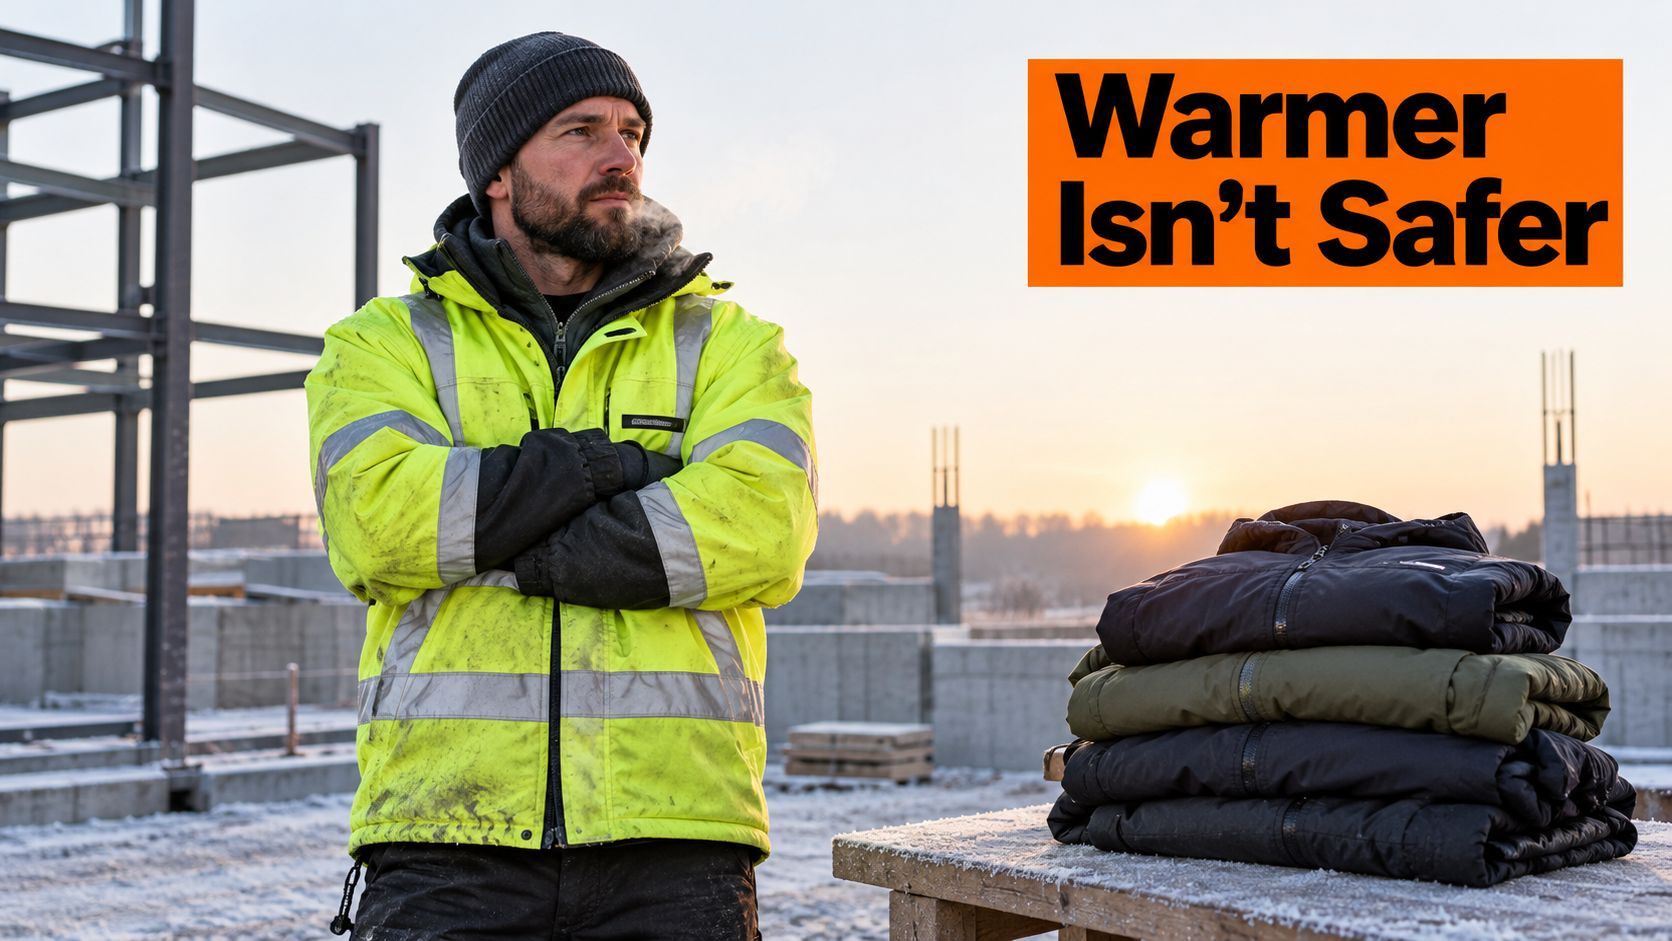
Cold exposure deserves a proper risk assessment. An Australian study of occupational injuries and illnesses estimated 15,409 cold-preventable cases during its study period, equivalent to 2.1 cases per 1,000 workers, with approximately 1,185 cold-attributable cases annually.
A substantial jacket belongs in that discussion, but it shouldn't be the only item on the table. Assess the worker's exposure and available controls, not just the clothing piled beside them.
Decide what needs controlling
Safe Work Australia's working-in-cold guidance recommends a combination of heating or vehicle cabins, shelter from wind and rain, warm and waterproof clothing, acclimatisation and worker education. That's a broader brief than buying everyone a heavier coat.
Use the exposure assessment to direct the response:
- Wind and rain: Assess shelter and protected waiting areas alongside clothing.
- Extended inactivity: Review access to warmth and opportunities to interrupt exposure.
- Hard physical work: Check whether workers can adjust clothing before they become sweaty.
- Repeated transitions: Establish how workers change, store and dry clothing between environments.
The warmest garment can be the wrong choice if its bulk prevents a worker from reaching properly or if they can't adjust it during demanding tasks. A lighter, more adjustable jacket may suit active work better, but that decision still depends on the full exposure assessment.
More insulation isn't an acceptable substitute for fixing an exposed waiting arrangement.
Keep the clothing discussion connected to the site's wider safety conversations.
Know when the jacket isn't enough
If someone remains cold in correctly selected clothing, don't automatically issue another layer and send them back. Reassess the conditions, task duration and access to protected spaces.
Supervisors should establish when workers report discomfort, where they go to recover warmth and who can change the work arrangement. Breaks or job rotation may belong in that plan where the assessment supports them. Those decisions require site-level ownership, not an assumption that PPE has already dealt with the hazard.
Hi-Vis, Reflective Tape and AS 4602.1 in Winter
Orange or yellow fabric isn't a complete visibility specification. Standards Australia identifies AS 4602.1:2024 as the standard for high-visibility occupational garments used around moving traffic, plant or equipment in high-risk situations; its preview specifies at least 0.20 m² of background material on both the front and back for Class D garments.
That background-area requirement is a useful purchasing benchmark, not permission to certify a jacket yourself with a tape measure. Ask for the garment's stated classification and supporting documentation, then confirm that it matches the intended visibility conditions.
Verify the finished garment
Start with the work requirement: daylight, night-time retroreflective viewing, low light or adverse environmental conditions. Procurement should obtain the relevant information before comparing colours or pocket layouts.
- Identify the classification: Record the supplier's stated garment class against the actual model being ordered.
- Check the worn configuration: Inspect the jacket fastened and adjusted as the worker will use it.
- Review obstructions: Look for outer garments, folded sections or equipment that cover visibility features.
- Inspect construction: Check how pockets, closures and seams interact with the specified high-visibility arrangement.
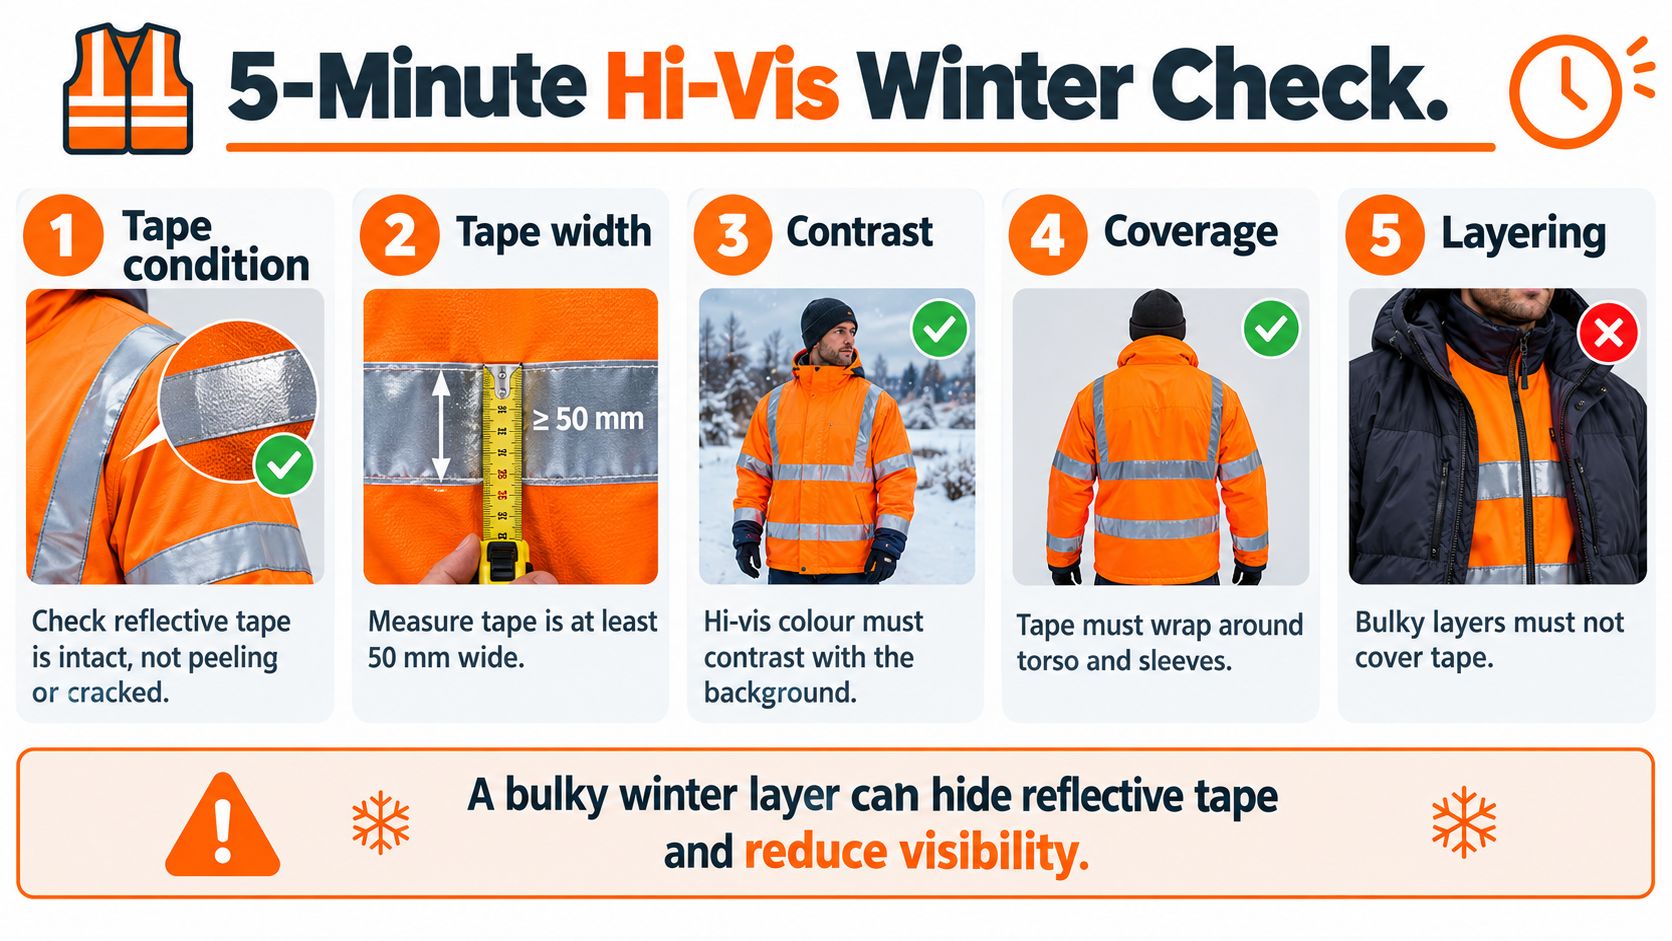
Use the visual below as an inspection prompt, not a substitute for the current standard or garment documentation. Confirm any dimensional or tape-layout requirement against the applicable classification rather than treating it as universal.
Keep decorative details separate from compliance
Reflective piping and a documented occupational visibility classification aren't interchangeable. A product description that mentions reflective detail still leaves a buyer with questions about the garment's intended use.
For terminology and practical inspection considerations, consult the hi-vis tape guide. Keep supplier evidence and site acceptance as the basis of the purchasing decision.
When evaluating samples, have workers wear their normal radios, belts and other required equipment. Inspect the resulting configuration from the front and back, including the position they adopt while performing their task.
Record the approved combination so workers and supervisors know what was assessed. Don't approve a jacket in isolation and then ignore what gets worn over it.
Thermal performance and verified visibility must be assessed together. Neither makes up for a failure in the other.
Fitting Women Properly on Australian Sites
Offering smaller unisex sizes isn't a complete fitting process. A review of PPE provision for women cites survey findings that 88% of tradeswomen had difficulty sourcing correctly fitting PPE, while 77% reported hazard exposure because of poor fit; it also identifies the lack of current Australian women's anthropometric data as a design barrier.
Treat women's winter work jackets as a fit and equipment-compatibility decision. A size label can't show whether the shoulders allow signalling, the hem sits properly over the hips or the sleeves work with gloves.
Measure over the intended layers
Use the manufacturer's measurement method and distinguish between body measurements and finished-garment measurements. Take the measurements with the actual winter layers available, rather than estimating how much room they'll need.
- Bust and upper body: Check closure without pulling across the chest or compressing the underlying layers.
- Hips and hem: Confirm the jacket closes comfortably at its intended length, both standing and seated.
- Shoulders and back: Compare the chart with the wearer's build, then verify reach in the sample.
- Sleeves and cuffs: Check coverage with arms extended and adjustment around the intended gloves.
Don't solve a tight hip fit by automatically going up until the shoulders and sleeves become excessive. Compare another cut. Equally, don't choose a close-fitting jacket just because it looks neater standing still.
Run a controlled movement trial
Ask the wearer to perform signalling movements, reach forward and overhead, bend and sit. Where climbing is part of the role, use a safe, controlled trial that reflects the required movements without introducing unnecessary exposure.
Fit harnesses according to their manufacturer's instructions and the site's procedures. Check the approved clothing arrangement without improvising harness routing or adjustment to accommodate a bulky jacket.
Then inspect the working details: can the wearer reach the radio, use the nominated pockets and access the tool belt? Do cuffs interfere with gloves, and does the hem lift enough to leave an unwanted gap during reaching?
Fit standard: Enough ease for layers and full movement, without loose fabric obstructing the worker or their equipment.
Give workers a private way to report fit problems and a genuine alternative when a sample fails. Record the accepted size and cut for each person rather than relying on a single crew-wide sizing assumption.
Matching the Jacket to Your Site Conditions
A useful jacket specification starts with a description of the shift. “Outdoor worker” is too broad to distinguish a rigger handling gear from someone spending extended periods in a static position.
Write down the dominant exposure, physical effort, shift pattern and required equipment. Then ask suppliers to respond to those conditions instead of sending whichever winter garment they sell most often.
Turn the work pattern into purchasing priorities
| Work pattern | Put first in the specification | Require during the trial |
|---|---|---|
| Exposed southern or elevated work | Suitable insulation adjustment and weather protection | Assessment during the expected task and waiting pattern |
| Windy coastal work | Documented shell suitability and usable closures | Collar, cuff and hood checks with required equipment |
| Wet conditions with active work | Weather protection, ventilation and dry-clothing arrangements | Access to adjustments while wearing gloves |
| Frequent cabin transfers | Comfortable seated fit and manageable bulk | Seat belt, control access and entry-and-exit checks |
| Static signalling or waiting | Clothing matched to inactivity and access to protected spaces | A supervised trial that includes stationary work |
These are purchasing priorities, not universal garment prescriptions. A coastal job doesn't automatically justify the same jacket for every worker, and a remote location doesn't automatically justify the heaviest insulation.
Specify the shift, not just the postcode
For a cold Pilbara start followed by active work, I'd prioritise adjustment and a practical place to stow removed clothing. For sustained wet southern exposure, I'd put documented shell suitability and the drying arrangements under closer scrutiny.
Shift length matters because the specification must remain workable beyond the first task. Ask where the worker can change, what happens if clothing gets wet and whether replacement garments are accessible.
Required PPE may narrow the options further. Get the relevant supervisor to review helmet and hood interaction, harness arrangements and any task-specific protective requirements before approving a sample.
Finish with a written acceptance note covering the selected garment, intended layers, approved work use and any limitations. Use the earlier visibility and fitting checks as sign-off criteria rather than restarting those decisions after the order arrives.
Standardise the acceptance process, not necessarily the jacket. Different roles may justify different approved combinations within the same crew.
A Pre-Buy Checklist for Crews and Procurement
Before signing off, confirm the following:
- Layer compatibility: Trial the complete clothing combination.
- Visibility: Obtain the stated classification and site acceptance.
- Individual fit: Include women and men in representative sample trials.
- Adjustment: Test ventilation, closures and cuffs with gloves.
- Equipment access: Check radios, pockets, belts and required PPE.
- Care arrangements: Confirm washing instructions, drying facilities and replacement procedures.
Reject the order if unresolved fit or documentation issues remain. Winter work jackets must support the cold-work plan, not replace shelter, cab heating, breaks or appropriate changes to the work arrangement.
Outrig Supply Co offers worksite hoodies, trade-focused apparel and crew bulk-order options for crane, rigging, FIFO and shutdown teams. Visit Outrig Supply Co to review the available gear, then bring your layering requirements, site visibility rules and crew fit needs to the ordering conversation.