

You're standing in the yard before the toolbox talk, jacket zipped to the top, and cold air still finds the one gap you can't zip shut. That's the problem a neck warmer fleece solves well when it's chosen as part of a layering system, and badly when it's bought on softness alone. Judge it on wind, sweat, fit under PPE and how fast you can get it off once work heats up.
Table of Contents
- Why Cold Necks Matter on Australian Worksites
- Specs to Check Before You Buy
- Fabric and Insulation Compared
- How to Fit a Neck Warmer Under Helmets and Hi-Vis
- Matching a Neck Warmer to Site Conditions
- What It Costs and How to Make It Last
- Build a Layering Kit Before the Next Early Start
Why Cold Necks Matter on Australian Worksites
A rigger on a steel deck at 5 a.m., waiting on the first lift, has a gap no jacket closes. The base layer ends below the throat, the collar sits lower than expected, and wind across the yard cuts straight through that strip of exposed skin. Shoulders hunch, the chin tucks, and some of the head movement needed to watch the load and the dogger goes with it.
Australian cold isn't uniform, which is why this small piece of kit matters more in some places than others. The Bureau of Meteorology climate averages for Bathurst show a long-term July mean minimum of 0.6°C in Bathurst, New South Wales, compared with 7.5°C in Adelaide and 8.1°C in Melbourne. Inland and southern sites sit in a different category from a mild coastal morning, even within the same state.
Cold Nights That Stick Around
Clear winter skies let heat escape from the ground overnight, so frosty starts keep returning through winter in those regions. For crews, the pattern is predictable. The coldest exposure happens before sunrise, during standby, and on the walk between the vehicle, the crib room and the work area, when the body isn't generating much heat yet.
A fleece tube closes the collar gap without the bulk of a heavier jacket. It supports a proper cold-weather setup by covering the spot where warm air escapes and cold air pours in every time the head turns. That test runs across the whole shift, though. It has to hold wind out at the collar while standing still, then come off in seconds once climbing, rigging or carrying gear pushes body temperature up. A neck warmer that does the first job but traps sweat for the second one creates the same problem it was bought to solve.
It earns its place in the kit in three situations:
- Pre-dawn starts: standing still for prestarts and permits while the body is at its coldest.
- Night operations: temperatures drop again after sunset, often when fatigue sets in and movement between tasks slows.
- Outdoor transitions: walks between vehicle and work area too short for a full extra layer, long enough for wind to chill exposed skin.
If your work sits mostly in warm daytime hours, you may rarely need one. If your roster includes early starts on inland or higher sites, keep one in the cab.
Specs to Check Before You Buy
A neck warmer can feel perfect in a shop and fail on the first windy prestart, so score any candidate against the specs that control warmth, fit and compatibility with the rest of your gear. Most of them come back to one question: what happens when your output changes. Standing still for a prestart, working hard on a lift and copping a gust across an open pad all ask different things of the same tube of fabric.
Neck warmer buying specs at a glance
| Spec | What to look for | Why it matters on site | Red flag |
|---|---|---|---|
| Fabric weight | Midweight 150 to 250 GSM for most crews | Insulates without bulk under a jacket | Below 150 GSM for overnight or wind-exposed work |
| Fibre content | Polyester-rich, not cotton-rich | Easy to verify on the label | Cotton-rich knit |
| Stretch | Four-way stretch that recovers its shape | Stays in place under a hard hat | Stretched out after one wash |
| Height | Covers chin to collar line; check the brand size chart | Closes the gap at the collar | Too short to reach the jacket collar |
| Seams | Flatlock or bonded | Avoids chafe under straps and respirator seals | Raised seams at the neck |
| Wind protection | Windproof face panel | Stops wind at the collar | Open knit that lets wind through |
| Colour | Hi-vis yellow or orange where the site requires it | Stays visible in low light | Dark colour on a site that requires hi-vis |
Weight, Fibre and Stretch
Start with fabric weight, because it sets the warmth range. A midweight fleece in the 150 to 250 GSM range suits most crews who alternate between standing and working. Below that range, a tube is fine for a cool walk in but thin for overnight standby in wind. Above it, you're into standby-only territory, and you'll pull it off the moment a task gets physical.
Fibre content is a label check rather than a feel test. Read the tag and look for polyester or a polyester-rich blend rather than a cotton-rich knit. How a tube feels in your hand at the counter tells you little about how it behaves halfway through a shift, so buy on the printed blend.
For stretch, pull the fabric wide and let it go. Four-way stretch that snaps back will sit at your chin through a shift and stay put under a hard hat strap. Fabric that stays baggy after one stretch in the shop will be sliding down your neck within a week.
Height, Seams, Wind and Colour
Check height against the brand size chart rather than guessing. The tube needs to cover from your chin down past your collar line, with enough length to tuck under a jacket. Too short, and the gap reopens every time you look up at a load.
Run a finger inside for seams. Flatlock or bonded construction lies flat under harness straps and won't lift a respirator seal or rub your jaw raw over a long shift. Raised seams at the neck are a walk-away fault for anyone in straps or respiratory gear.
Wind protection is the spec buyers skip and regret. Plain fleece lets wind push straight through the fibres, so look for a windproof panel across the front. A panel on the face side still leaves the rest of the tube able to breathe when your pace picks up, which keeps it wearable across the whole shift rather than only at the cold end of it. Finally, check colour against your site rules. Dark colours disappear in low light, so choose hi-vis yellow or orange where your site requires visible layers at all times.
Buying rule: Score the candidate against every row, and if you work outdoors in wind, don't buy one without a windproof face.
Fabric and Insulation Compared
Think of fleece as a stack of tiny pockets of still air held between fibres. Your body warms that trapped air, and the pockets slow its escape. Everything that matters about a neck warmer fleece comes back to whether the fibres keep holding that air once sweat, rain and compression get involved.
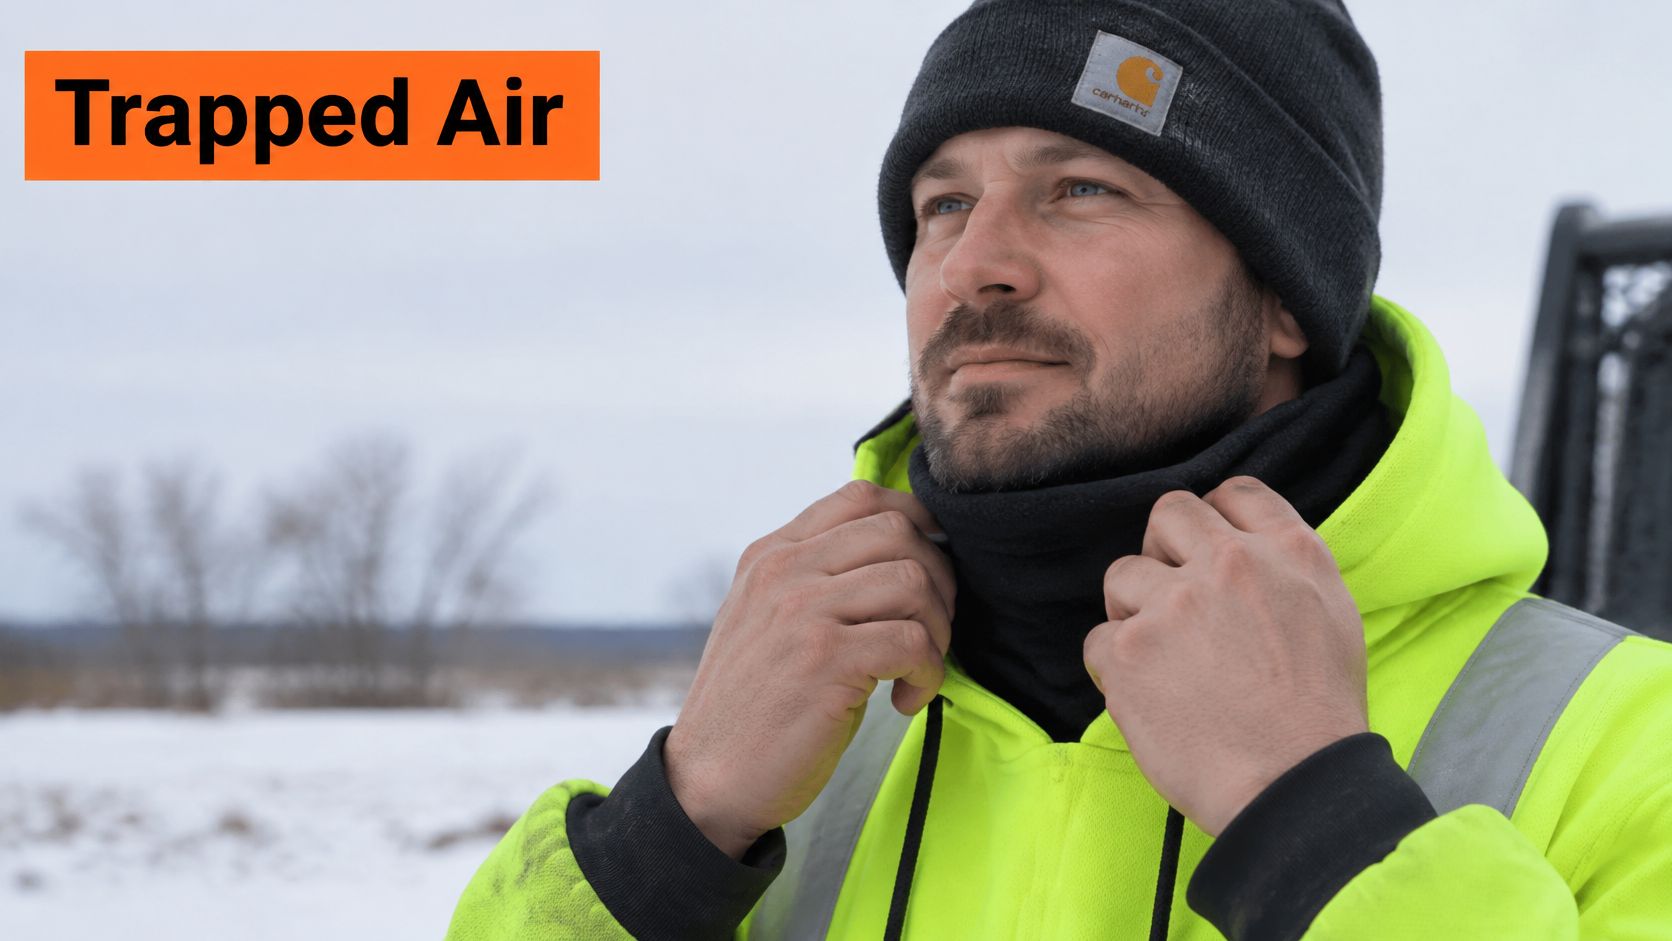
The photo below shows the low-bulk fit you're aiming for under hi-vis, with the tube sitting at the chin rather than bunched at the throat.
What Happens When It Gets Damp
When sweat or rain flattens the fibres, the air pockets collapse and the layer stops insulating. That's why fibre choice beats thickness on a worksite where you'll sweat during a lift and then stand still for twenty minutes. Synthetic insulation keeps useful warmth when damp, which is why polyester-based fleece suits wet conditions and high-output work where a natural knit would stay soggy.
Neck warmer materials compared
| Material | Warmth when damp | Breathability | Best for |
|---|---|---|---|
| 100% polyester fleece | Holds insulation and dries fast | Moderate | General site use in cold starts |
| Microfleece | Holds insulation and dries fast | Good | Active tasks in mild cold |
| Heavy pile or sherpa fleece | Holds insulation but dries slowly | Lower | Standby, cold nights and low-output roles |
| Merino or wool blend | Holds warmth when damp | Good | Mixed-climate crews and sensitive skin |
| Cotton-rich knit | Loses insulation when wet | Low when wet | Avoid on site |
Microfleece is the active worker's option. It's thin, breathes well and dries between tasks, so it suits riggers and fitters who generate their own heat. Heavy pile and sherpa-style fleece trap more air and feel warmer standing still, but they dry slowly and overheat fast once you're moving. Reserve them for spotters, crane operators during cab transitions and night standby. If you want the detailed case for that heavier pile in a jacket layer, read the guide to a sherpa lining jacket before you commit.
Merino blends hold warmth when damp and sit comfortably against skin that reacts to synthetics, at a higher price. Cotton-rich knit is the clear failure in the table. It holds moisture against your neck, loses its insulation and chills you during the next inactive spell.
The short video below shows how different fleece weights handle movement and layering in practice.
Choose the heaviest material you can remove quickly, not the heaviest one on the shelf.
Match the fabric to your output level. Lighter microfleece for active tasks, heavier pile for standby and cold starts, and polyester as your default when the forecast includes rain or you'll be sweating into it daily.
How to Fit a Neck Warmer Under Helmets and Hi-Vis
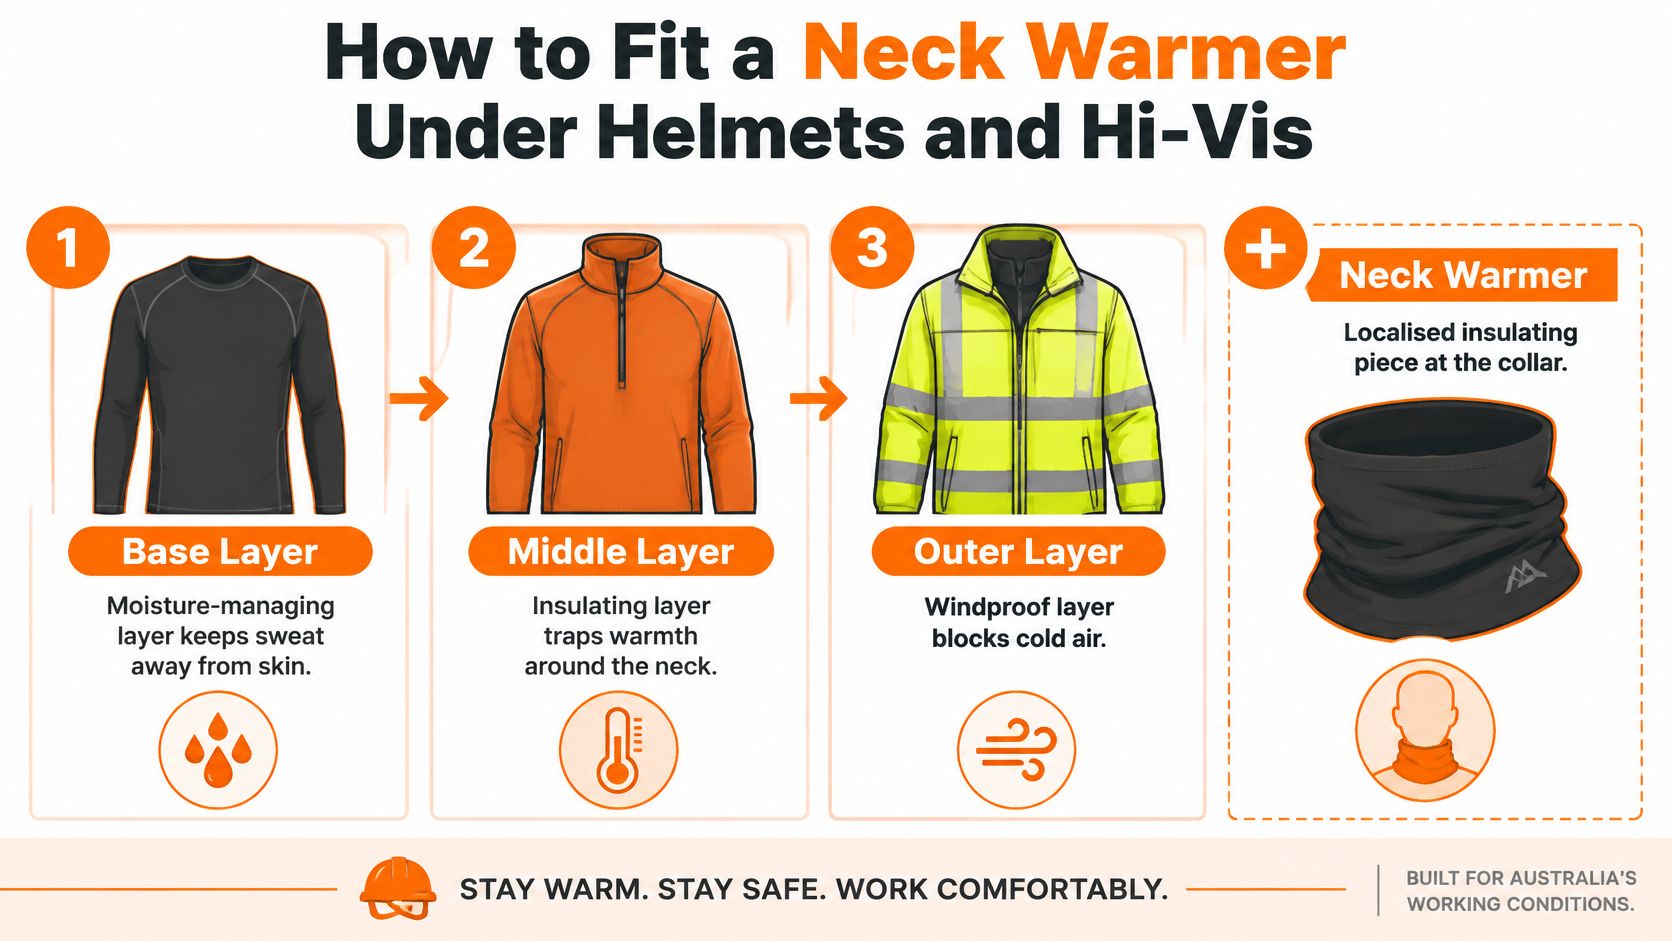
Work from the three-layer principle and the neck warmer finds its place naturally. The SafeWork NSW guidance on cold environments recommends a moisture-managing inner layer, an insulating middle layer of wool or synthetic fibres, and a windproof or waterproof outer layer. Your neck warmer acts as a localised insulating piece at the collar, filling the one spot those three layers leave open.
The infographic below sets out how those layers stack with the neck warmer sitting at the collar.
The Six-Step Fit Check
Run this check at home or in the crib room, not at height or beside a live lift.
- Put it on before the hard hat: The helmet and its strap should sit over the top edge of the tube, not under it, so the warmer can't ride up and bunch at your jaw.
- Tuck the lower edge under your collar: Pull it down inside your hi-vis hoodie or jacket collar so there's no open gap for cold air to pour through when you turn your head. If you're rebuilding that middle layer, the overview of hi-vis shirts covers what to check for collar fit and visibility.
- Test your jaw and mouth: Talk, call a lift direction and take a drink. If the fabric drags on your chin or muffles your voice, pull it below your mouth for any task involving radio or hand-signal communication.
- Check seals and glasses: A respirator seal and safety glasses must still sit flat against your skin. If the tube lifts either one, reposition it lower or choose a thinner style, because a broken seal is worse than a cold neck.
- Move through your full range: Turn your head fully left and right, look up, then crouch. The warmer shouldn't ride up over your chin, slip below your collar or catch on a harness strap or lanyard connection point.
- Decide your removal point in advance: Pick the moment, such as the start of the first physical task, when you'll pull it down around your neck or off into a pocket. Deciding early stops you overheating and soaking it with sweat you'll regret at the next standby.
When the Warmer Isn't Enough
A neck warmer insulates. It doesn't block weather. In wind or rain, cold air strips the warm air out of plain fleece faster than your body replaces it, and wet fabric against skin chills you during inactive spells. That's the point where a windproof outer layer over the top does the essential work, with the warmer still sealing the collar underneath it.
Fit faults usually show up as small annoyances first. Fogged glasses mean warm breath is escaping upward, so drop the tube below your nose. A sore jaw means the fabric is too tight or riding too high. A cold strip at the back of your neck means the tube is too short or has slipped out from under your collar. Fix the specific fault rather than adding more layers over it.
Matching a Neck Warmer to Site Conditions
Find the row that matches your roster, then read across to the pairing column before you buy. The right warmer under the wrong outer layer still fails in wind, and the warmest tube on the table becomes a liability once the work heats up.
Neck warmer choice by site condition
| Condition | Typical example | Suggested neck warmer | Pair with |
|---|---|---|---|
| Pre-dawn inland starts | Bathurst-type overnight cold | Midweight fleece with windproof face | Insulated jacket over hi-vis |
| Cool coastal mornings | Still winter mornings in the southern capitals | Lightweight microfleece | Windbreaker over hi-vis |
| Wind-exposed crane deck or work at height | Open decks and cab transitions | Full-coverage windproof-faced fleece | Wind-resistant outer layer |
| Mild days, cold early starts | Warm-day sites with cold mornings | Lightweight, removable fleece | Stored in the vehicle for the walk in |
| Summer shutdowns or high-output tasks | Heavy work in warm weather | Thin, quick-drying fabric, or none | Base layer only |
Where Buyers Choose Wrongly
The most common mistake is buying for the coldest row and wearing it everywhere. A midweight windproof-faced tube that earns its place at a pre-dawn inland prestart turns into a sweat-soaked liability on a milder morning once you start moving. For those starts, lightweight microfleece under a windbreaker gives you collar coverage you can pull below your chin without cooking.
The second mistake is under-specifying for wind-exposed work at height. On an open crane deck or during cab transitions, moving air strips heat faster than still air at a lower reading, so the forecast temperature understates what your neck feels. A full-coverage windproof-faced fleece under a wind-resistant outer layer is the minimum there, because either piece on its own leaves a path for cold air to reach skin.
The third mistake is leaving the warmer on through high-output tasks. In summer shutdown work or heavy manual handling, a thin quick-drying fabric or bare skin is the right call. A saturated fleece tube holds sweat against your neck and chills you through the next rest break.
Each row works as a system rather than a garment. The fleece seals the collar, the outer layer blocks the wind, and your planned removal point handles the warm-up once physical work starts.
Where Clothing Sits in the Controls
Clothing is only one part of managing cold. The WorkSafe ACT guidance on working in cold weather advises employers to reduce exposure first, including limiting work during the coldest parts of the day where practicable, and lists scarves among the personal protective options alongside hats, beanies and gloves. A fleece neck warmer sits squarely in that neck-covering category.
The same guidance places personal protective equipment last in the hierarchy, the least effective control in the stack. Schedule the hardest tasks outside the coldest hours, line up shelter and warm-up breaks, then issue the neck warmer as the backup that covers what planning cannot reach. A supervisor who hands out fleece tubes instead of planning around the coldest hours has the order backwards.
What It Costs and How to Make It Last
The spread in this category is narrow, and that is the trap. Listed 2026 prices run from under ten dollars to the mid-thirties, close enough that the wrong buy costs you comfort rather than money.
Neck warmer prices in Australia, 2026
| Product | Price (AU$) | Notes |
|---|---|---|
| Salomon unisex neck gaiter | 34.99 | Listed 2026 Australian price |
| Sherpa polyester fleece neck warmer | 14.95 | Listed 2026 Australian price |
| Sherpa polyester fleece neck warmer, discounted colour | 9.99 | Discounted price for one colour variant, 2026 |
Listed prices move, so confirm the current figure before ordering for a crew. What the table can't show is fabric weight, windproof facing or stretch recovery, which is why price only means something checked against the spec list. A cheap tube with no windproof face still leaves a path for cold air at your collar, and a premium gaiter with weak recovery still sags.
Cost Per Season, Not Sticker Price
I would judge these on cost per season, not the ticket. A cheaper fleece that holds its stretch and shape for two winters beats a premium tube that sags below your chin after one. The failure mode is almost never a torn seam. It's lost recovery in the stretch fibres, thinning across the front where your chin and stubble work the fabric, and a windproof face that cracks or peels.
That reframes the table. The discounted colour at the lowest price is the smart buy if the fabric weight and construction match the full-price version, because colour does nothing for insulation. Where your site requires hi-vis, though, a discounted dark colour is money wasted no matter how cheap it is. The neck warmer is the cheapest piece in your collar stack and the one that takes the most abrasion, so buy two of a mid-priced option that passes the spec checklist and rotate them. A damp warmer worn on consecutive early starts holds sweat against your skin once the work rate climbs, which is exactly when you need the fabric dry and wicking.
Care Steps That Protect the Value
- Wash cold, inside out, with similar colours: Hot water and rough loads break down stretch fibres and fade hi-vis colours fastest.
- Use mild detergent and skip fabric softener: Softener coats the fibres and cuts wicking, so sweat sits in the fabric instead of moving through it.
- Air dry flat and avoid the tumble dryer: Dryer heat damages elastic recovery and can distort a windproof face panel.
- Remove pills with a fleece shaver: Shaving lifts surface pills cleanly, while pulling them tears fibres and thins the fabric at exactly the spots that rub your chin.
- Replace it on condition, not age: Retire the warmer when it no longer sits at your chin, thins across the front or loses its windproof face, because each fault reopens the collar gap it was bought to close.
Store it dry and uncompressed between seasons, ideally in the same bag as your beanie and gloves so the whole cold-start kit travels together. Insulation is trapped air. A warmer crushed under tools in a ute tray for six months comes out flattened, and flattened fleece does less of that job when wind hits your collar.
Build a Layering Kit Before the Next Early Start
Buy the kit as a system, not piece by piece. A neck warmer that seals at the chin still leaves you cold if the hoodie collar under it gaps, and a combination that feels right at the prestart can turn into a sweat problem once the work rate climbs. Each piece below covers a job the others cannot do, and the neck warmer itself gets bought separately against the spec table because the Outrig Supply Co catalogue does not carry them.
The Three-Piece Checklist
- Neck warmer: Midweight fleece with a windproof face for cold or wind-exposed starts, chosen against every row of the spec checklist. Buy two if you are on consecutive early rosters.
- Windproof outer layer: Sized to fit over your hi-vis layer without restricting your shoulders or harness connection points. The comparison of winter work jackets covers what to check for wind and rain protection at this level.
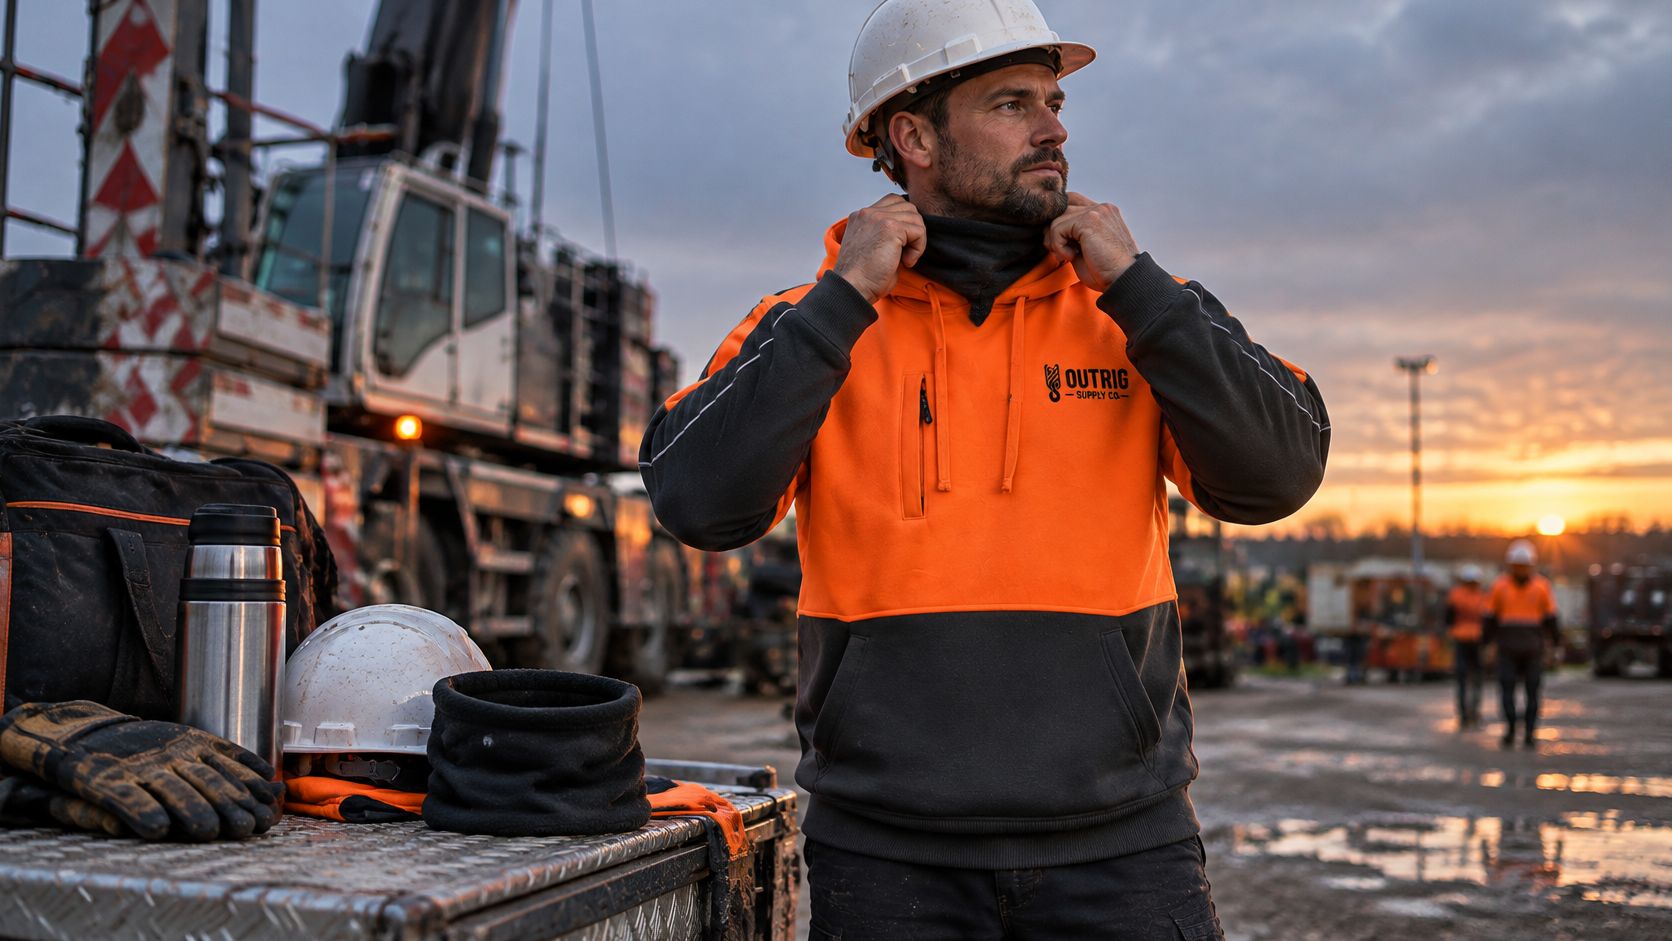
- Hi-vis hoodie as the middle layer: This carries your visibility and a large share of your insulation, so it needs a collar height that overlaps the neck warmer rather than fighting it.
One example of that middle layer is the Outrig Supply Co Hi-Vis Hoodie – Orange/Black, priced at AU$95. Check stock and size availability on the product page before a shutdown order, and leave time for delivery if you are kitting out a full crew.
Test It Before You Trust It
- Test the full kit on one cold start: Wear every piece together with your hard hat and harness, because compatibility faults only show up in combination.
- Note where it runs hot and drop a layer: Overheating during the first task means your middle layer or warmer is too heavy for your output level, so adjust before the next shift rather than sweating through it.
- Confirm requirements with your site first: Check visibility class, colour and PPE rules with your site or employer before buying hi-vis, since a compliant garment on one site may not pass on another.
Before the next roster, wear all three pieces on one cold start and work through your first task at full pace. If the collar still gaps, or wind pushes through at the chin once you are moving, change the warmer before you add weight anywhere else.
Outrig Supply Co builds apparel and worksite gear for crane operators, riggers, FIFO workers and shutdown crews, including hi-vis hoodies that work as the middle layer in the kit described above. Pair one with a neck warmer chosen against the spec checklist and the collar stays sealed through the pre-dawn prestart. Visit Outrig Supply Co to see the current range and size options before your next cold roster.